Getting a zero export device wrong at the wiring stage means the DISCOM inspection fails and the whole commissioning schedule slips by weeks. A correct zero export device installation guide india asset owners can follow needs six things done in order: confirm DISCOM approval terms, pick the right CT and RTU, wire them without polarity errors, calibrate the export threshold, run load-drop tests, and set up ongoing monitoring so the reading never drifts out of compliance again.
Key Takeaways
- Documentation comes first: Most rejected inspections trace back to a net metering agreement clause that was never checked before hardware purchase.
- CT placement decides accuracy: A current transformer mounted on the wrong side of the utility meter, or with reversed polarity, produces false export readings that no amount of software tuning can fix.
- Calibration is not a one-time job: Response time settings that work under steady load can cause inverter “hunting” (rapid output swings) under variable commercial load profiles.
- DG-PV synchronisation adds a layer: Sites running diesel backup need the zero export logic tested specifically during generator switchover, not just grid-connected mode.
- Drift happens without maintenance: A device calibrated correctly at commissioning can report inaccurate readings within 12-18 months without preventive AMC checks and remote monitoring.
Zero Export Installation At a Glance
| Installation Step | Typical Duration | Key Component | Common Failure Point |
|---|---|---|---|
| DISCOM documentation check | 1-2 weeks | Net metering agreement, export limit clause | Missed export cap clause |
| Hardware selection | 2-5 days | CT, RTU/dongle, m2m SIM | Undersized CT rating |
| Wiring at interconnection point | 1 day (rooftop), 2-3 days (ground-mount, multi-inverter) | CT, RS-485/Modbus cabling | Reversed CT polarity |
| Calibration | Half day | Export threshold, response time | Inverter hunting under variable load |
| Compliance testing | 1 day | Load-drop test, DISCOM sign-off | Skipped no-load test scenario |
| Ongoing accuracy checks | Quarterly under AMC | Remote dashboard, technician visit | No preventive recalibration schedule |
1. Confirm DISCOM Requirements Before You Buy Hardware
Every state DISCOM in India treats export limits differently. Some mandate a hard zero export device solar setup for any installation above a defined capacity threshold; others allow limited export with a capped feed-in. Before ordering any equipment, pull the actual net metering agreement signed with the DISCOM and check the export clause line by line, not just the summary page.
This step matters because commissioning teams routinely discover, at the inspection stage, that the agreement specifies a device certified to a particular accuracy class or response time that the purchased hardware doesn’t meet. Rejected inspections cost more in reschedule delays than the device itself. If your installation already has a zero export requirement flagged, our earlier piece on what a zero export setup is and why asset owners need it covers the regulatory backdrop in more depth.
Keep a documentation folder ready with the single-line diagram, inverter datasheets, and the DISCOM’s export limit letter. Commissioning engineers ask for these on the spot, and missing paperwork is one of the most avoidable reasons for a delayed sign-off.
2. Choose the Right CT, RTU, and Communication Setup
The current transformer (CT) is the sensor that tells the whole system how much power is flowing toward the grid. It must sit at the exact point of interconnection, sized to the site’s full-load current, not just the inverter’s rated output. Undersized CTs saturate under peak generation and report inaccurate readings right when accuracy matters most.
The RTU (remote terminal unit) or dongle receives the CT signal and relays the export command to the inverter. For commercial sites with multiple inverters, the RTU needs enough communication ports, or a daisy-chain capability, to control every inverter in sync. Connectivity typically runs on an m2m sim card for cellular backhaul, which keeps the data flowing even if the site’s regular internet drops. If you’re deciding between RTU types for this exact use case, the comparison in RTU vs Datalogger Solar Monitoring Comparison is worth reading before you finalize a vendor.
Match the device’s rated current and voltage class to the inverter brand and count on site. A single zero export controller rated for three inverters will not reliably manage a ten-inverter commercial array, even if the total capacity looks similar on paper.
3. Wire the CT and RTU to the Inverter Correctly
This is where most installation errors happen. The CT has a directional polarity, marked on its casing, and it must clamp the correct conductor with the arrow pointing toward the load, not the source. Reverse it and the device reads export as import, or reports zero flow when power is actually backfeeding into the grid.
Communication wiring, usually RS-485 or Modbus, runs from the RTU to each inverter’s data port. On larger commercial sites this means daisy-chaining multiple inverters on a single bus, and getting the termination resistors and addressing right so no inverter drops off the network mid-operation.
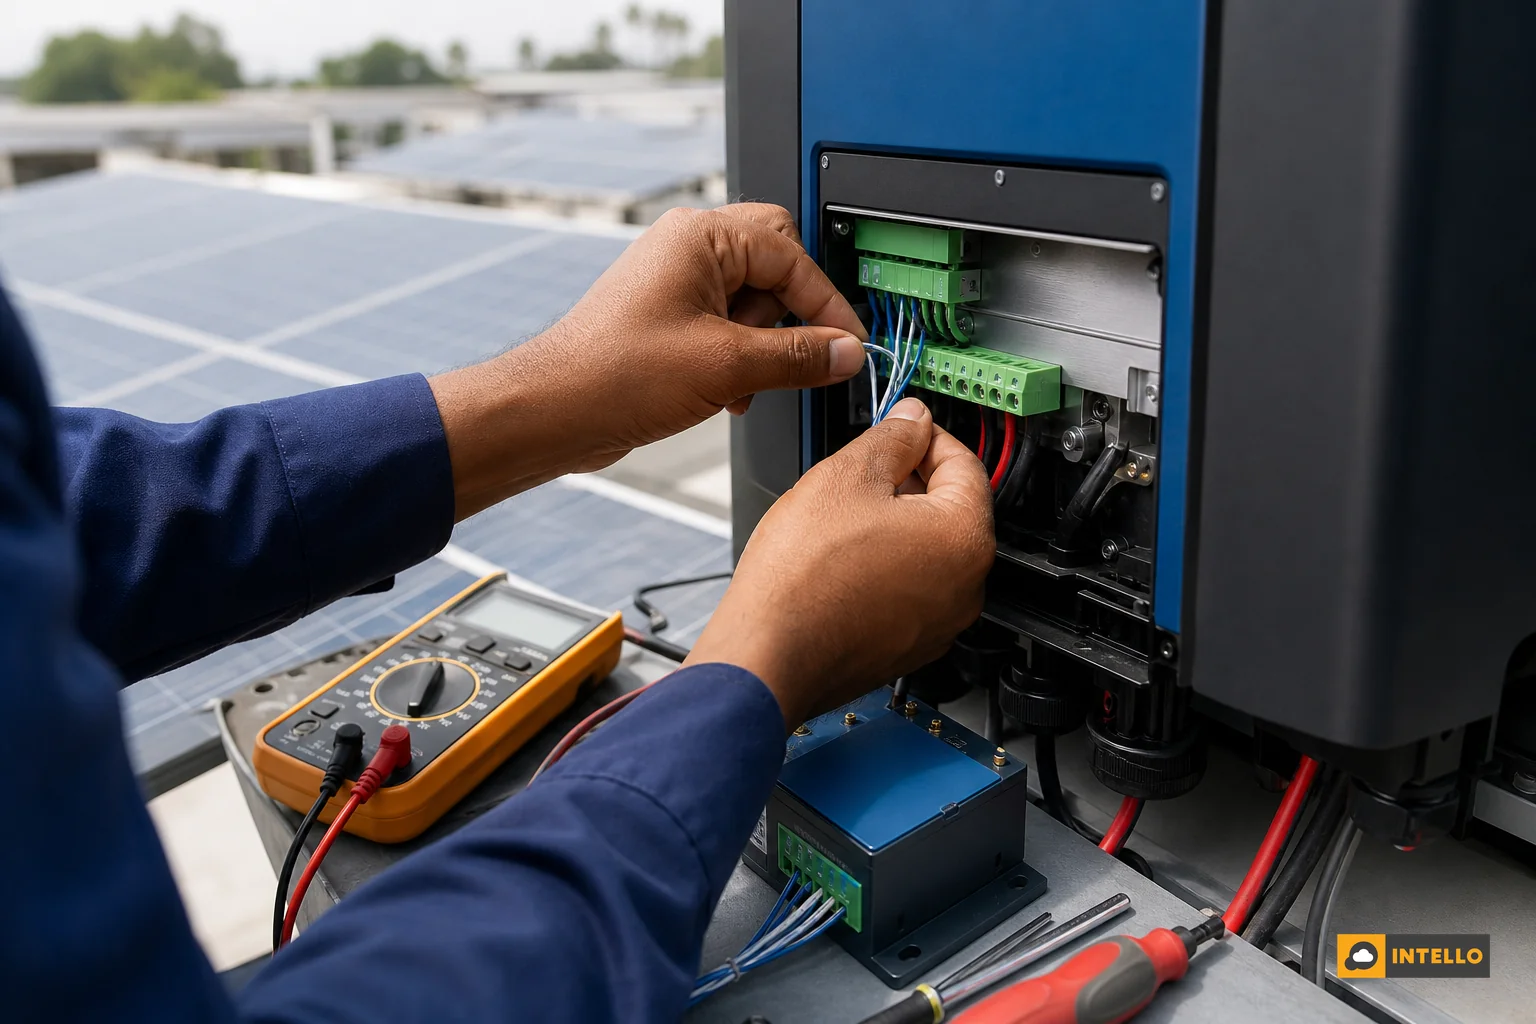
A wiring mistake that shows up often on site audits: the CT is installed on the DISCOM meter side instead of the plant’s own interconnection point, which makes the export reading include grid-side loads that have nothing to do with the solar plant. Double-check the single-line diagram against the physical panel before closing it up.
- Loose gland connections: vibration over months works cables loose, causing intermittent communication drops.
- Wrong cable shielding: unshielded RS-485 runs near high-current cabling pick up electrical noise and corrupt readings.
- Missing earthing: an ungrounded RTU enclosure can produce erratic sensor values during monsoon humidity.
4. Calibrate the Zero Export Device
Calibration sets the export threshold, usually at or near zero kW, and the response time the inverter takes to curtail output once export is detected. Set the response too slow and the plant briefly backfeeds into the grid before curtailment kicks in, which is exactly what the DISCOM inspection checks for. Set it too aggressively and the inverter oscillates, ramping output up and down repeatedly, a behavior called hunting that wears down inverter relays over time.
Test calibration under three conditions: steady daytime load, a sudden load drop (like machinery switching off at a factory), and near-zero site load such as a Sunday shutdown at a commercial facility. Each scenario stresses the response curve differently, and a device tuned only for one will misbehave in the others.
5. Test for Compliance and Accuracy
Before calling the DISCOM for final inspection, run your own load-drop test: disconnect a known load and confirm the inverter curtails within the required response window, typically a few seconds depending on the state’s technical standard. Log the export reading continuously for at least 24 hours across varying load conditions and keep that data as your audit trail.
DISCOM inspection teams in most states will re-run this test themselves, so having your own log ready speeds up the sign-off and gives you a reference point if a dispute comes up later about whether export ever exceeded the sanctioned limit.
6. Common Installation Mistakes That Cause Faulty Readings
Field visits across commercial and residential sites turn up the same handful of errors repeatedly:
- CT installed backward or on the wrong feeder: produces inverted or irrelevant readings that pass a casual glance but fail closer inspection.
- Firmware never updated: older dongle firmware sometimes has known bugs in export calculation logic that the manufacturer has already patched.
- No DG-PV synchronisation testing: sites with diesel backup need the zero export logic verified specifically during the switch from grid to generator power, because the export reference point changes.
- Ignoring seasonal drift: monsoon humidity and temperature swings can shift sensor calibration slightly, something a one-time commissioning test won’t catch.
- Treating it as a set-and-forget device: without periodic checks, a working device at commissioning can silently drift out of tolerance within a year.
Getting DG-PV interaction right also protects the generator itself; our detailed breakdown of what a solar AMC contract should cover versus a standalone O&M contract explains where this kind of synchronisation check typically sits in a maintenance scope.
7. Keeping the Device Accurate Long-Term With O&M Support
A zero export device that passed its commissioning test in January can drift out of compliance by the following monsoon if nobody is checking it. This is where a structured solar amc with built-in preventive maintenance solar checks earns its cost back many times over, since a DISCOM penalty for undetected export is far more expensive than a quarterly calibration visit.

Intello’s remote monitoring dashboard tracks export readings continuously and flags any deviation from the sanctioned threshold before it becomes a compliance issue, not after a DISCOM notice arrives. Field technicians on payroll (not subcontracted) handle recalibration visits, firmware updates, and CT re-checks as part of scheduled AMC visits, with photo-verified reports logged through the field mobile app. For asset owners managing sites across multiple states, this kind of centralized tracking also ties into a broader centralized monitoring setup for multiple solar sites, so compliance status is visible from one dashboard instead of chasing individual site reports.
Residential owners often assume zero export compliance is a commercial-only concern, but smaller rooftop systems in states with strict net metering caps face the same DISCOM scrutiny. The experience homeowners report after a year of proper AMC coverage, including export compliance checks, is detailed in Residential Solar AMC Benefits India.
Zero Export Installation Cost Factors in India
Costs vary by plant size and complexity rather than following a flat rate. The main variables that move the budget are:
- Number of inverters: more inverters mean more communication ports, longer wiring runs, and longer calibration time.
- CT rating and count: higher current-rated CTs and multiple feeder points increase hardware cost.
- RTU/dongle type: a custom RTU with string-level visibility costs more upfront than a basic off-the-shelf logger but reduces long-term troubleshooting time, a tradeoff explored in RTU vs Datalogger Solar Monitoring Comparison.
- m2m SIM connectivity plan: ongoing data charges for remote transmission add a small recurring cost.
- DISCOM inspection and documentation fees: vary by state and utility.
- Labour and site complexity: ground-mounted plants with longer cable runs between the interconnection point and the inverter room take longer to wire than a compact rooftop setup.
Because pricing depends heavily on these site-specific factors, the most reliable way to budget is a site assessment rather than a generic quote. You can request a quote once your plant’s single-line diagram and inverter count are ready.
Frequently Asked Questions
Is a zero export device mandatory in India?
It depends on the state DISCOM and the plant’s sanctioned capacity. Many states require it for commercial and industrial installations above a certain size, or for any site where the net metering agreement caps export at zero. Check your specific agreement rather than assuming a blanket national rule.
How long does a typical installation take?
A straightforward rooftop installation with one or two inverters usually takes a single day for wiring and calibration. Larger commercial or ground-mounted sites with multiple inverters can take two to three days, plus separate time for DISCOM inspection scheduling.
Can a zero export device work alongside a diesel generator?
Yes, but it needs specific testing during the switch between grid and generator power. This is where dg pv synchronisation logic and zero export control need to be verified together, not treated as two separate systems.
What happens if the device fails a compliance test?
The DISCOM inspection team will typically flag the specific fault, whether it’s response time, CT accuracy, or wiring, and require a re-test after correction. Keeping a detailed installation log speeds up diagnosing which step needs rework.
Does the device need maintenance after installation?
Yes. Sensor drift, firmware updates, and physical wear on connections mean a device accurate at commissioning can go out of tolerance within a year without periodic checks, ideally built into a preventive maintenance schedule.
A zero export device is only as reliable as the maintenance behind it. Commissioning gets you compliant on day one; ongoing preventive checks keep you compliant on day 500.
If your plant already has a zero export device installed and you’re unsure whether it’s still reading accurately, or you’re planning a new commercial or residential installation and want the wiring and calibration done right the first time, Intello’s O&M teams handle both new installations and ongoing accuracy checks through a single monitoring dashboard. Contact us to schedule a site assessment, check your plant’s live status through the portal login if you’re already an existing client, or learn more about Intello’s O&M approach before your next DISCOM inspection deadline.